How to Set Up Apple HomeView
Apple HomeView ships on November 13, 2026, and if you preordered one, you’ll want it running the moment it’s out of the box. This guide shows you how to set up Apple HomeView step by step, what you need before you start, and how to fix the most common setup problems.
HomeView is Apple’s $299 smart display. It has a 7-inch screen, a Center Stage camera for video calls, the rebuilt Siri AI, and it doubles as a hub for Apple Home and Matter smart home devices. Setup is quick, but one requirement trips people up: your iPhone must be on iOS 27.2 or later.
Quick answer: Update your iPhone to iOS 27.2, plug in HomeView, hold your unlocked iPhone near it, follow the on-screen prompts, add it to a room in the Home app, then set up face recognition for each person in your home.
What You Need Before You Set Up Apple HomeView
Check these before you unbox it. Missing any one of them is the main reason HomeView setup fails.
- An iPhone on iOS 27.2 or later, or an iPad on iPadOS 27.2 or later. Older versions can’t set it up.
- An Apple Account signed in on that device.
- A Wi-Fi network that your iPhone is already connected to. HomeView joins the same network.
- Bluetooth turned on on your iPhone.
- A power outlet near where HomeView will sit, or a wall-mount spot if you bought the wall-mount version.
- Your own device for each family member. Apple says every person who wants a personal experience needs their own Apple Account and iPhone or iPad.
How to check your iOS version
Open Settings > General > Software Update. If iOS 27.2 is available, tap Update Now and let it finish before you plug in HomeView. If you only see iOS 27.1 or earlier, Apple hasn’t pushed 27.2 to your phone yet. Check again on launch day.
How to Set Up Apple HomeView in 7 Steps
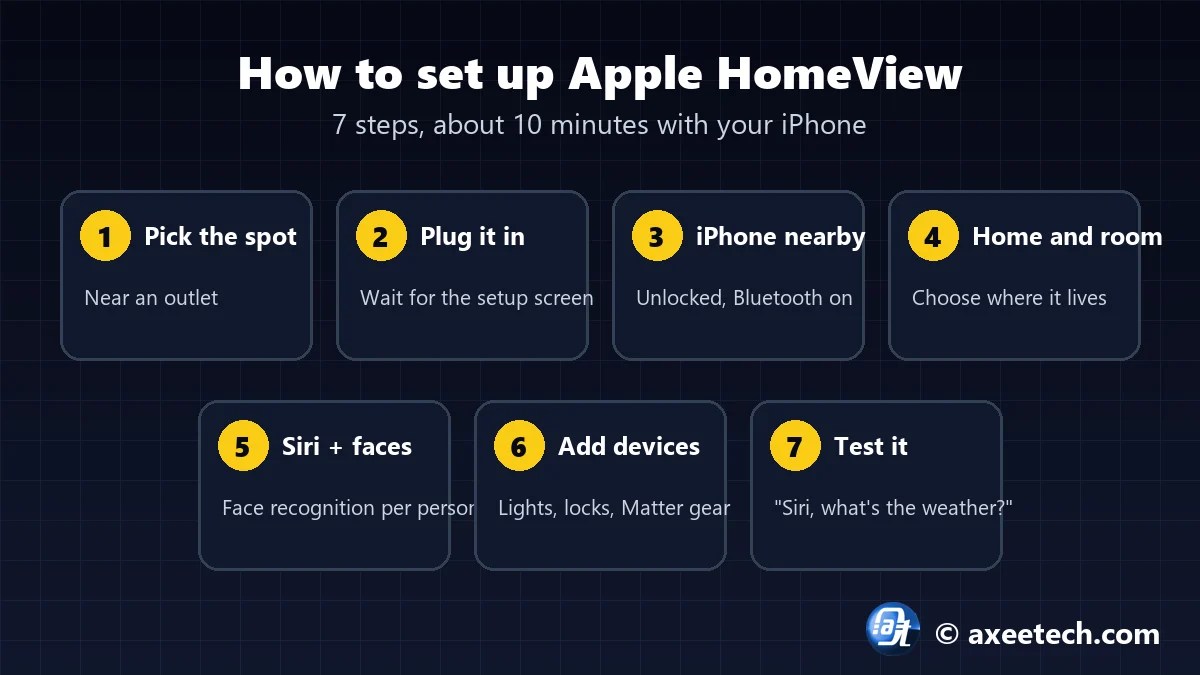
Here is the full Apple HomeView setup process. It takes about 10 minutes.
Step 1: Pick the right spot
HomeView comes in two versions at the same $299 price: one with a speaker base for a counter or shelf, and one for wall mounting. Pick a spot where the camera can see faces at normal height, because face recognition is how HomeView knows who is using it. A kitchen counter or hallway wall works well. Avoid placing it facing a bright window, which can make face recognition less reliable.
Step 2: Plug in HomeView and wait for the setup screen
Connect the power cable and wait for HomeView to start. You’ll see a setup screen asking you to bring your iPhone or iPad close.
Step 3: Hold your unlocked iPhone near HomeView
Unlock your iPhone and hold it next to HomeView. A setup card should pop up on your iPhone, the same way it does with AirPods or a HomePod. Tap Set Up. If the card doesn’t appear, open the Home app, tap the + (Add) button, and choose Add Accessory.
Step 4: Choose your home and room
Select which home HomeView belongs to (if you have more than one in the Home app), then pick a room such as Kitchen or Living Room. The room matters because Siri uses it for commands like “turn off the lights in here.”
Step 5: Set up Siri and face recognition
Follow the prompts to enable Siri AI. Then set up face recognition. HomeView can recognize up to six people in a household and show each one their own calendar, messages, and suggestions.
Each family member has to do this from their own iPhone or iPad with their own Apple Account. For personal info like Messages, Calendar, and third-party app content to show, MacRumors reports Apple’s requirement is that HomeView recognizes your face and your paired iPhone is nearby and was recently unlocked.
Step 6: Add your smart home devices
HomeView works as a home hub for Apple Home (HomeKit) and Matter accessories. Devices you already have in the Home app will show up automatically. To add new ones, open the Home app on your iPhone, tap +, choose Add Accessory, and scan the device’s setup code. Apple’s guide on adding accessories to the Home app covers this in detail.
Step 7: Test it with a few commands
Try these to make sure everything works:
- “Siri, what’s the weather today?”
- “Siri, turn off the living room lights.”
- “Siri, show me a recipe for pancakes.”
- Tap your iPhone to the front of HomeView while music is playing to move playback over. TechRadar’s hands-on describes this handoff feature.
Apple HomeView Specs at a Glance
| Feature | Apple HomeView |
|---|---|
| Price | $299 (both versions) |
| Release date | November 13, 2026 |
| Display | 7-inch |
| Camera | Center Stage camera for video calls |
| Assistant | Siri AI |
| Face recognition | Up to 6 household members |
| Smart home | Apple Home and Matter hub |
| Speaker base | Down-firing woofer + two passive radiators |
| Colors | Silver, Starlight, Rose Pink, Space Gray |
| Requires | iPhone with iOS 27.2+ or iPad with iPadOS 27.2+ |
Apple HomeView Setup Problems and How to Fix Them

The setup card doesn’t appear on my iPhone
Make sure Bluetooth and Wi-Fi are on and your iPhone is unlocked. Check that you’re on iOS 27.2. If it still doesn’t show, use Home app > + > Add Accessory instead.
HomeView won’t show my messages or calendar
Personal content needs three things: HomeView must recognize your face, your iPhone must be on the same Wi-Fi, and your iPhone must have been unlocked recently. If any of these is missing, HomeView shows only general info.
My partner or kids can’t get a personal experience
Every person needs their own Apple Account and their own iPhone or iPad. Invite them to your home in the Home app first, then have them set up face recognition from their own device.
I can’t find an App Store on HomeView
There isn’t one. MacRumors reports that third-party apps appear on HomeView from your iPhone or iPad, similar to how CarPlay works. Install the app on your iPhone and it can show content on HomeView.
Some Siri features stop working
Apple says some server-side Apple Intelligence features have daily usage limits, and expanded access will cost extra in the future. If a feature stops responding, you may have hit the daily limit.
Is Apple HomeView Worth It?
If you already use an iPhone and have a few HomeKit or Matter devices, HomeView is the easiest way to control them from one screen without picking up your phone. At $299, it costs more than an Amazon Echo Show or Google Nest Hub, but it’s the only smart display that works fully with Apple Home, Siri, and your iPhone.
If you don’t use an iPhone, skip it. HomeView can’t be set up without an Apple device.
Frequently Asked Questions
Does Apple HomeView need an iPhone?
Yes. You need an iPhone with iOS 27.2 or later, or an iPad with iPadOS 27.2 or later, to set up Apple HomeView.
When does Apple HomeView come out?
Apple HomeView ships on November 13, 2026. Preorders opened on October 13 on Apple’s website and Amazon.
How much does Apple HomeView cost?
HomeView costs $299 in the US. The speaker-base and wall-mount versions are the same price.
How many people can use one HomeView?
HomeView can recognize up to six household members by face and personalize the screen for each one.
Does Apple HomeView work with Matter devices?
Yes. HomeView acts as a hub for both Apple Home (HomeKit) and Matter accessories, which are sold separately.
Can I wall-mount Apple HomeView?
Yes. Choose the wall-mount version at checkout. It comes without the speaker base and costs the same $299.
Final Thoughts
Now you know how to set up Apple HomeView from start to finish: update to iOS 27.2, plug it in, pair it with your iPhone, assign a room, set up face recognition for everyone, and add your smart home devices. The whole process takes about 10 minutes.
For more Apple guides, see our iOS 27.2 release guide and our touchscreen MacBook Pro vs M6 MacBook Pro comparison. You can also read Apple’s official Apple Home Collection announcement.

Axee Davies is the founder of AxeeTech, publishing gaming guides, codes, and Windows how-tos since March 2013. A tech enthusiast for 13+ years — starting with smartphones and Android rooting — he now runs a site that puts out a new guide every day for Roblox players, traders, and Windows users. More about AxeeTech
More Apple You May Like
 SD Card Says “You Need to Format the Disk”: How to Fix It Without Losing Photos
 India’s 7 Best No Deposit Signup Bonus Offers for 2026
 Blooket Join: How to Join a Game at play.blooket.com (2026 Guide)
 JoinPD.com: How to Join a Pear Deck Session With a Code (2026 Guide)
 Top 3 Free online MBOX to PST Converters
 Common Causes of Sewage Backup That Require Emergency Sewage Cleanup Services
 Windows Resource Protection Could Not Start the Repair Service
 MEMORY_MANAGEMENT Blue Screen in Windows 10 and 11: 8 Fixes
