Ekadence Link Sections: How to Link Classes and Merge Content
Teach the same course in several periods? Learn how to Ekadence link sections so one set of modules, assignments and grading settings works across all of them. This guide walks through the full process in Ekadence, from Setup Class to the final Save, with screenshots.
Linking sections in Ekadence, the platform used by Anaheim Union High School District (AUHSD), lets you build content once and share it with every linked period. The tutorial recommends linking before you add any content, so plan this step early.

What You Need Before You Start
- An Ekadence faculty login for your school.
- Two or more classes already created for the same course, such as different periods.
- Your grading categories, if you use weighted grades.
How to Ekadence Link Sections Step by Step
Follow these steps in order. The example uses an AP US History class, but any course works the same way.
Quick overview:
- Open your class and click Setup Class
- Check grading categories and weights
- Add a co-teacher and bell schedule if you need them
- Save your settings
- Click Link Sections and choose the courses
- Choose whether to merge content, then save
Step 1: Open the Dashboard and choose your class
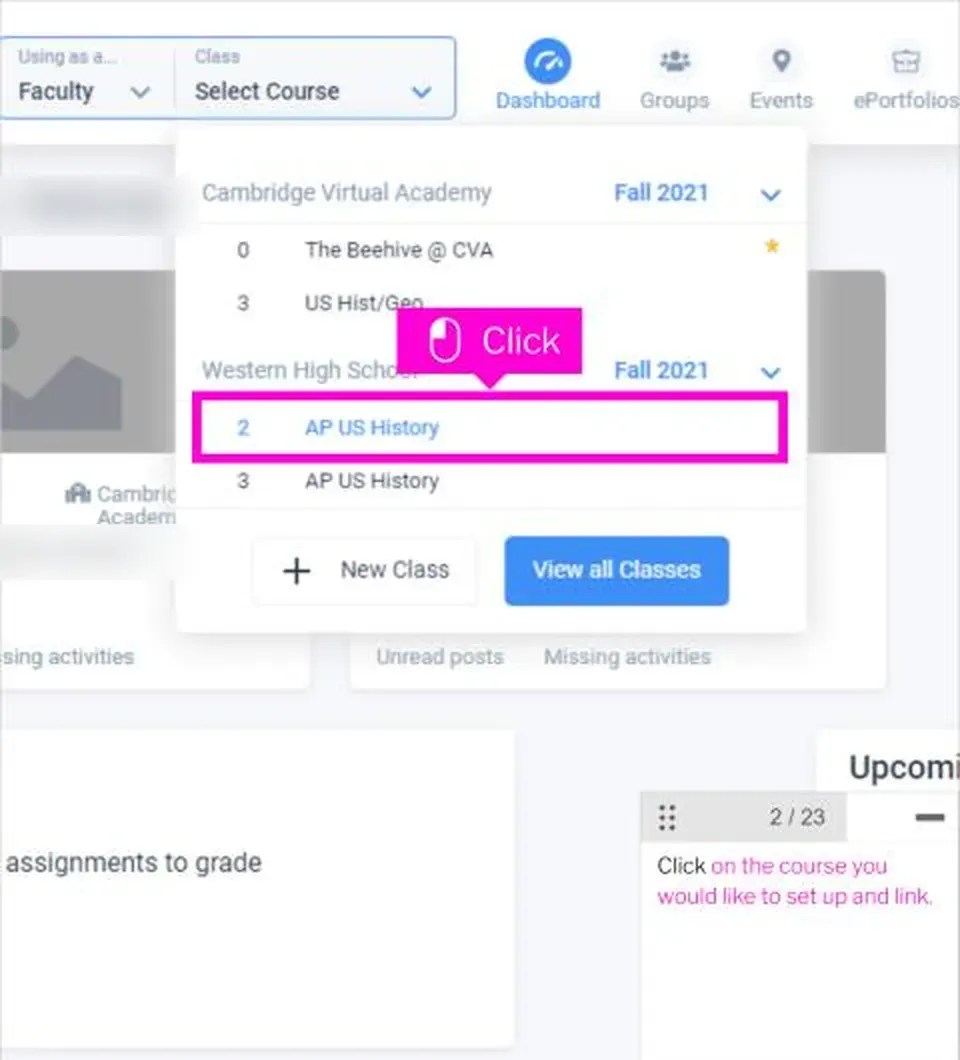
From the Dashboard, click the down arrow next to Select Course, then click the course you want to set up and link.
Step 2: Click Setup Class
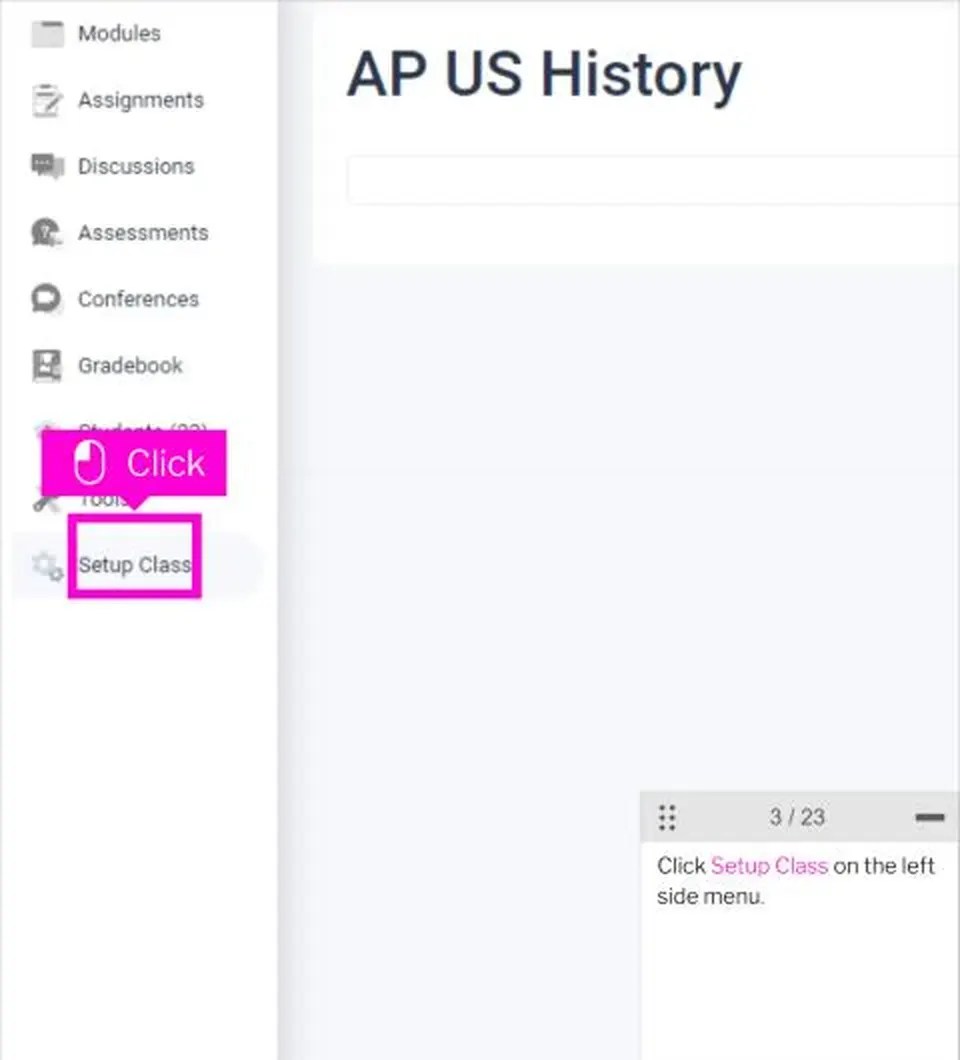
In the class menu on the left, click Setup Class.
Step 3: Scroll down and click Setup categories
Scroll to the Grading section and click Setup categories next to Grading Categories. If you moved material over from another system, the categories might already be set up.

Step 4: Turn on weighted categories (optional)
To use weighted grades, click the box next to Weight categories, then enter a percentage for each category. Make sure the total is 100%.

Step 5: Save the categories
When the categories are complete, click Save.
Step 6: Close the box
Click the small X in the top right corner to close the window.
Step 7: Add a co-teacher (optional)
If you have a co-teacher or aide, scroll to Co-teaching, click Add Faculty and search by name.

Step 8: Set the class meeting times (optional)
Under Bell Schedule, click the time boxes to choose when the class meets. Pick the hour first, then the minutes, and click Ok. Remember to change the time for late-start days, such as Thursdays.
Step 9: Click Save
Click Save at the bottom of the page. This is a precaution before you link sections.
Step 10: Click Link Sections
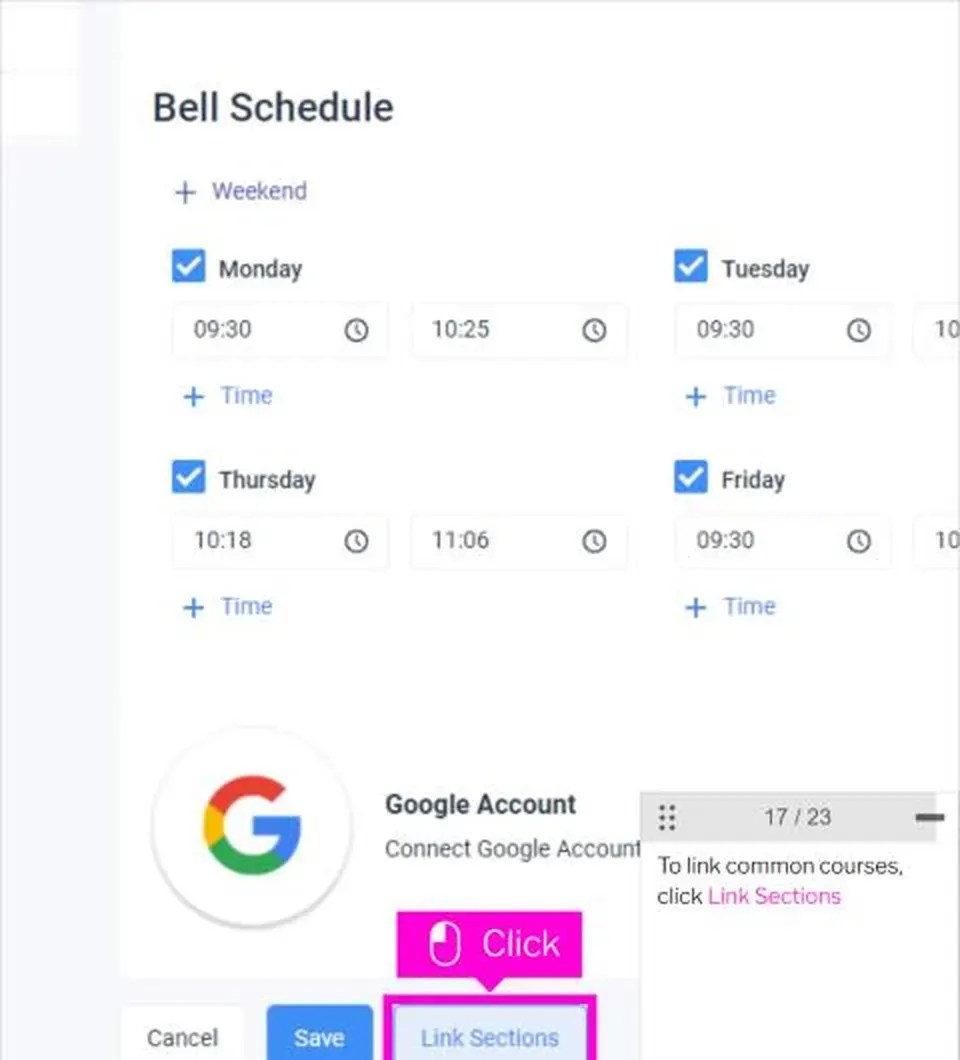
To link common courses, click Link Sections at the bottom.
Step 11: Select the courses to link
A dialog box shows the courses available to link to. Click the box next to each course you want to link.

Step 12: Click Save in the dialog
Click Save to confirm your choices.
Step 13: Choose whether to merge content
A warning explains that you are about to link additional classes. To merge their existing content with the current class, check the Merge box. It is recommended that you link before adding content to your courses.

Step 14: Click Save in the warning box
Click Save in the warning window.
Step 15: Click Save at the bottom of the page
Click Save at the bottom of the page one more time. It is a double check, and then you are done. Each linked class now appears under Bell Schedule.
Tips for Linking Sections in Ekadence
- Link sections before you add assignments, so nothing has to be merged later.
- Set your grading categories first, because linked classes share them.
- If you need to start from scratch in a new term, create a new class before linking.
- Reuse old units by learning how to copy modules to your current classes.
Ekadence Link Sections Not Working?
- You cannot see Link Sections: check that you are in Setup Class and have faculty access.
- A course is missing from the list: make sure it is created for the same term and school.
- The merge box is greyed out: save your settings first, then try linking again.
- Still stuck: contact your school’s technology support or the AUHSD help desk.
Ekadence Link Sections FAQ
What does linking sections do? It connects classes that share a course so content and settings can be managed together.
Should I check the Merge box? Check it if you want existing content in the other classes combined with your current class. The tutorial recommends linking before adding content.
Can I add a co-teacher while linking? Yes. Add a co-teacher under Co-teaching in Setup Class before you click Link Sections.
More School Tech Guides
Next, see how to transfer scores to new students in Ekadence or hide old classes from your dashboard. You may also like our Flex Securly student group guide. For district news, visit Anaheim Union High School District.

Axee Davies is the founder of AxeeTech, publishing gaming guides, codes, and Windows how-tos since March 2013. A tech enthusiast for 13+ years — starting with smartphones and Android rooting — he now runs a site that puts out a new guide every day for Roblox players, traders, and Windows users. More about AxeeTech